Quick Start
Get Know Reply up and running in five steps. You can complete this in under 5 minutes.
What you need
Section titled “What you need”- A business email address (Gmail, Outlook, or any IMAP provider)
- Your website URL (for building the knowledge base)
Step 1: Create your account
Section titled “Step 1: Create your account”Sign up at app.knowreply.ai with your email and password.
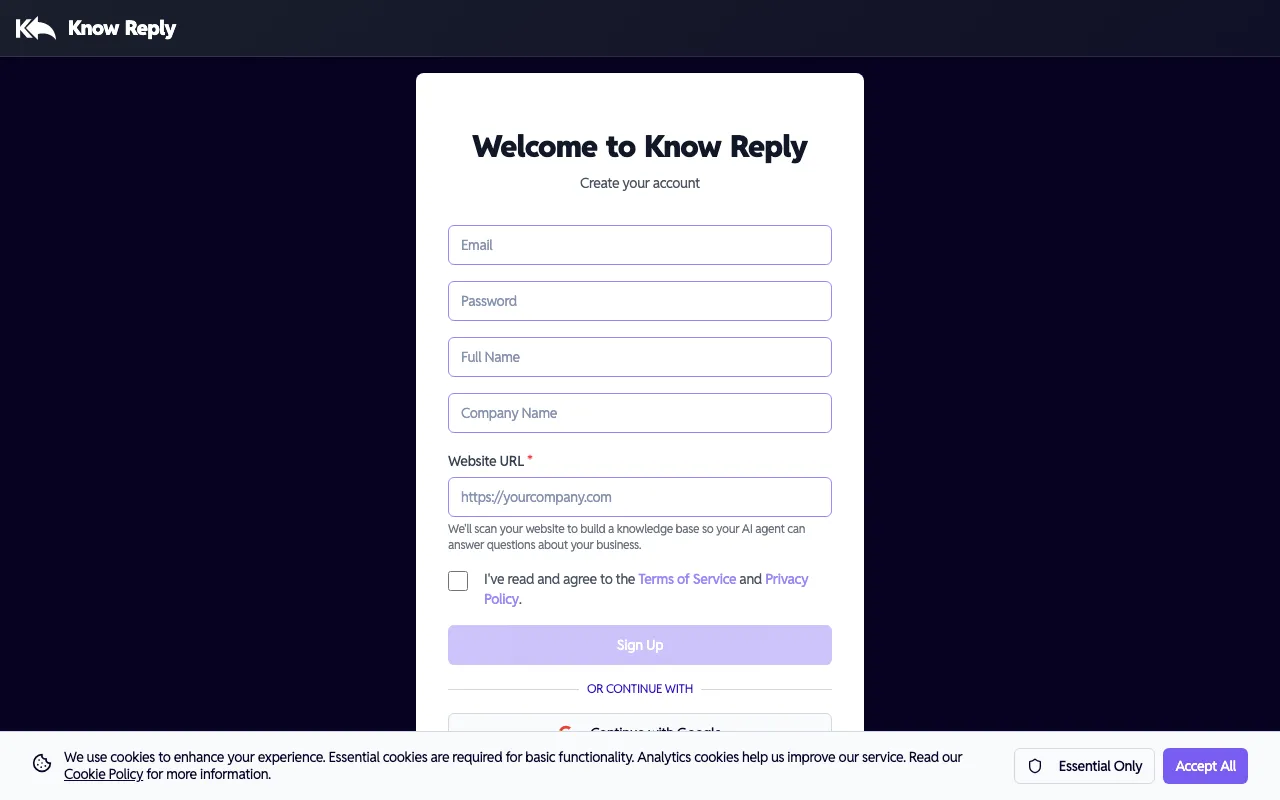
During signup, enter your Company Name and Website URL. Know Reply uses this to automatically create your first AI agent and begin scanning your website for knowledge base content — so your agent is ready to go before you even log in.
Using Google or OAuth to sign up? Your agent won’t be auto-created since we can’t collect your company URL during OAuth. No worries — you can create one in seconds using the Setup Wizard after logging in.
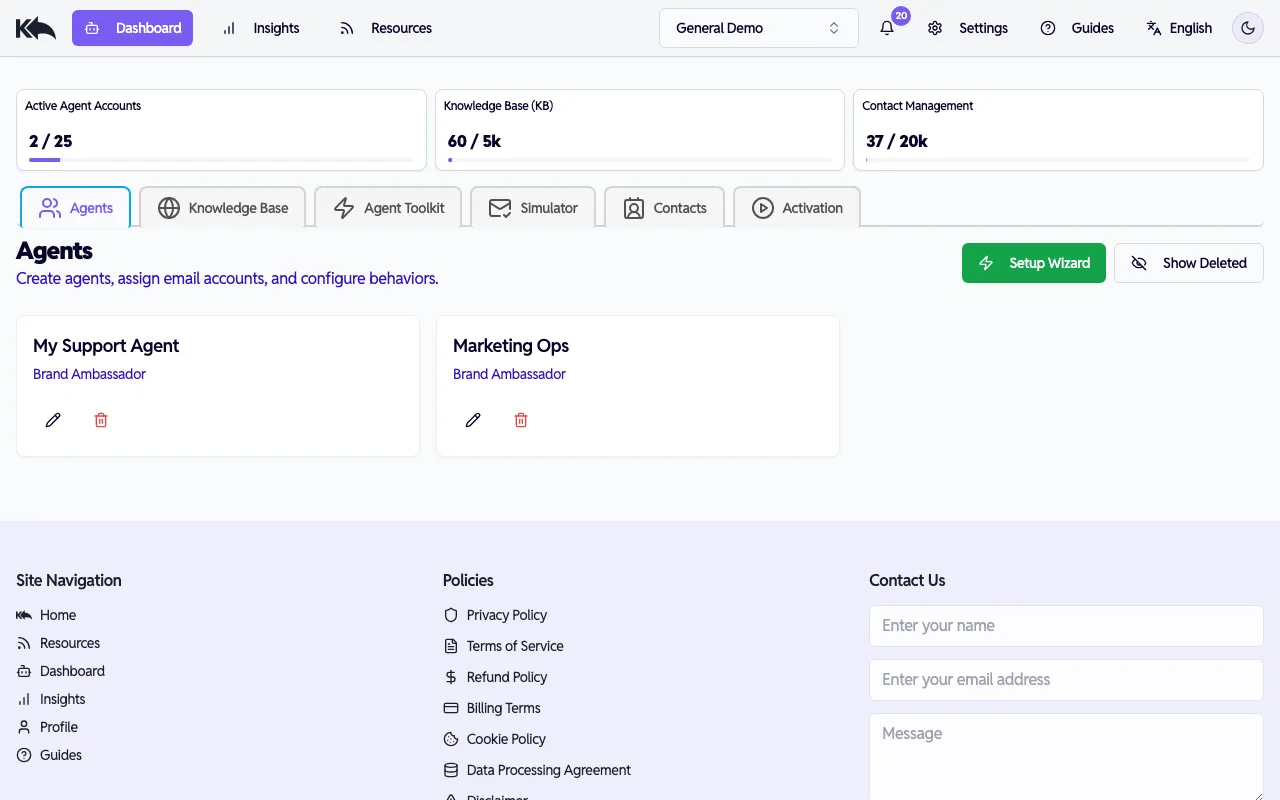
Step 2: Launch the Setup Wizard
Section titled “Step 2: Launch the Setup Wizard”After logging in, you’ll land on the Dashboard. Click Setup Wizard to create a new agent (or configure an additional one).
Name your agent and connect a website
Section titled “Name your agent and connect a website”Give your agent a name and select which websites it should use as a knowledge base. You can also add a new website URL here.
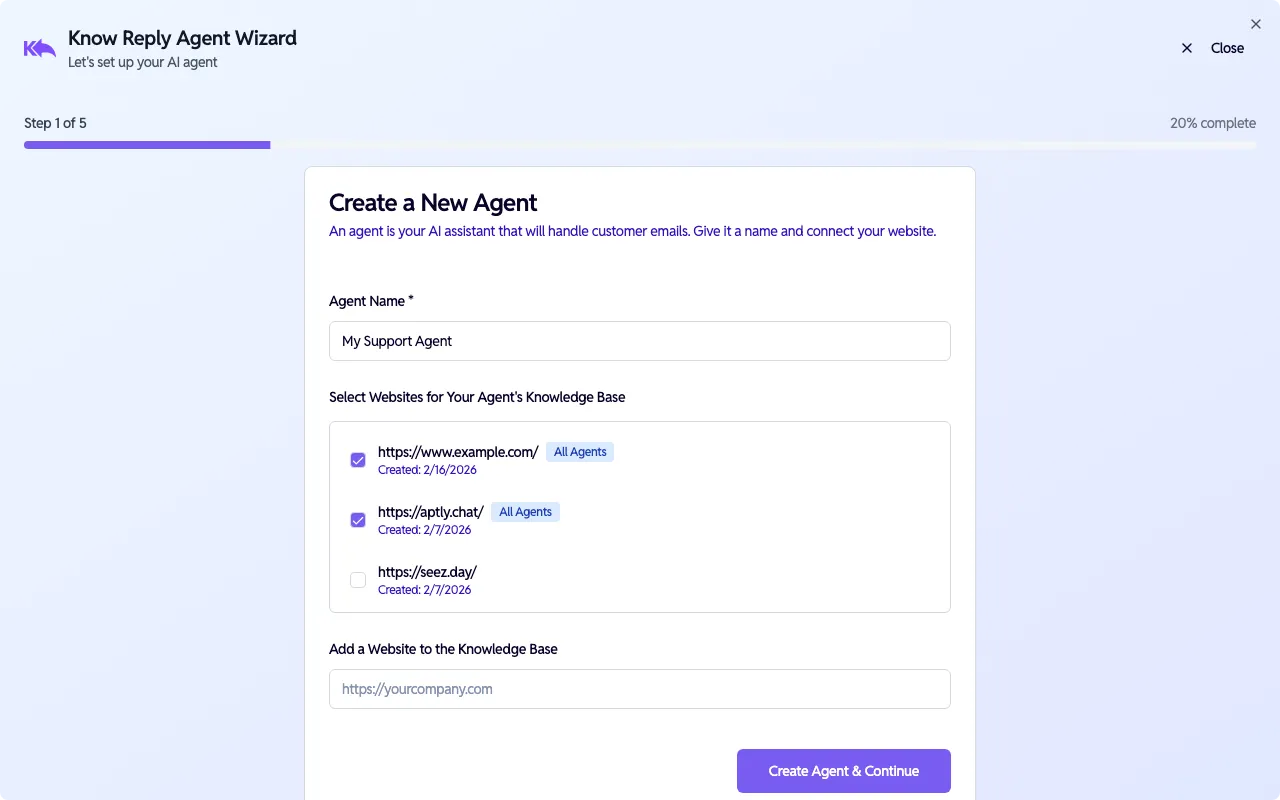
Click Create Agent & Continue to proceed. Your website will start scanning in the background.
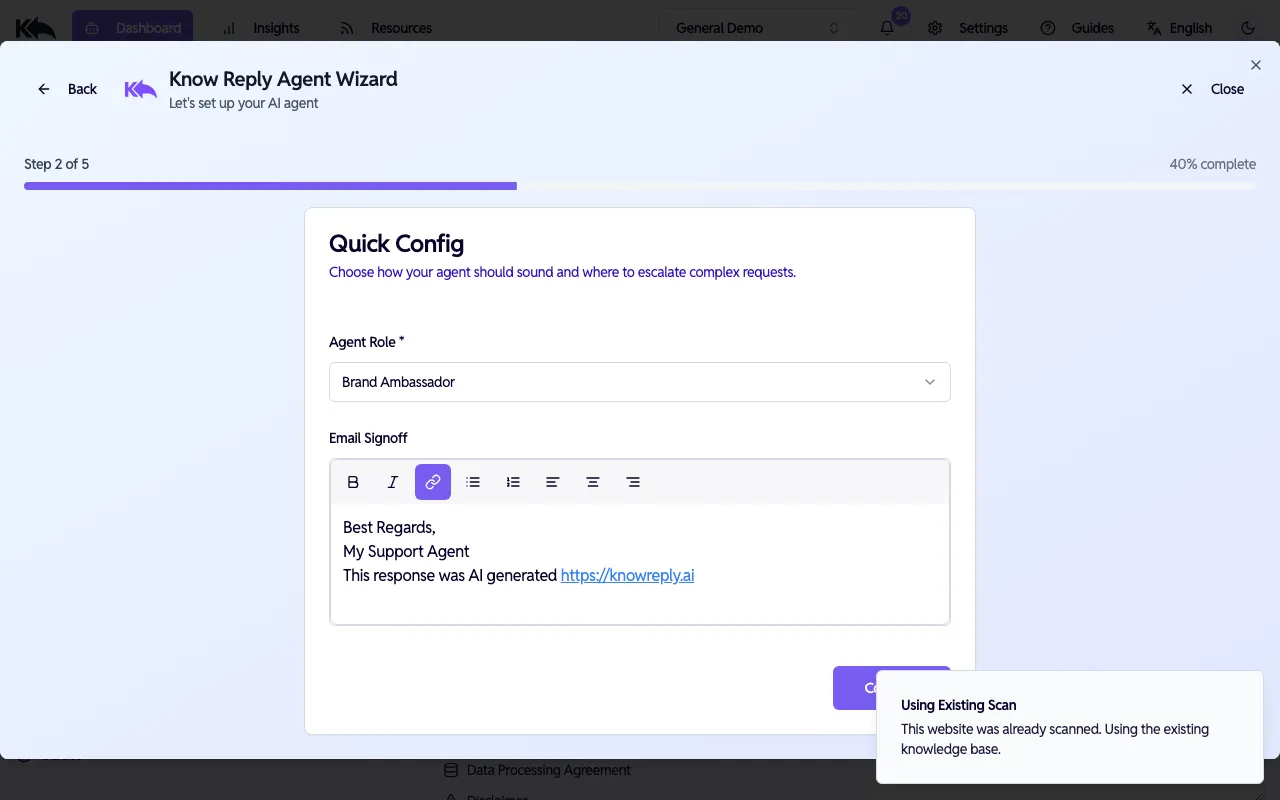
Configure role and signoff
Section titled “Configure role and signoff”Choose an Agent Role (Brand Ambassador, Customer Support, Sales, etc.) and customize the Email Signoff that appears at the end of every reply.
Connect your email
Section titled “Connect your email”Link the inbox your agent will monitor. Choose from three methods:
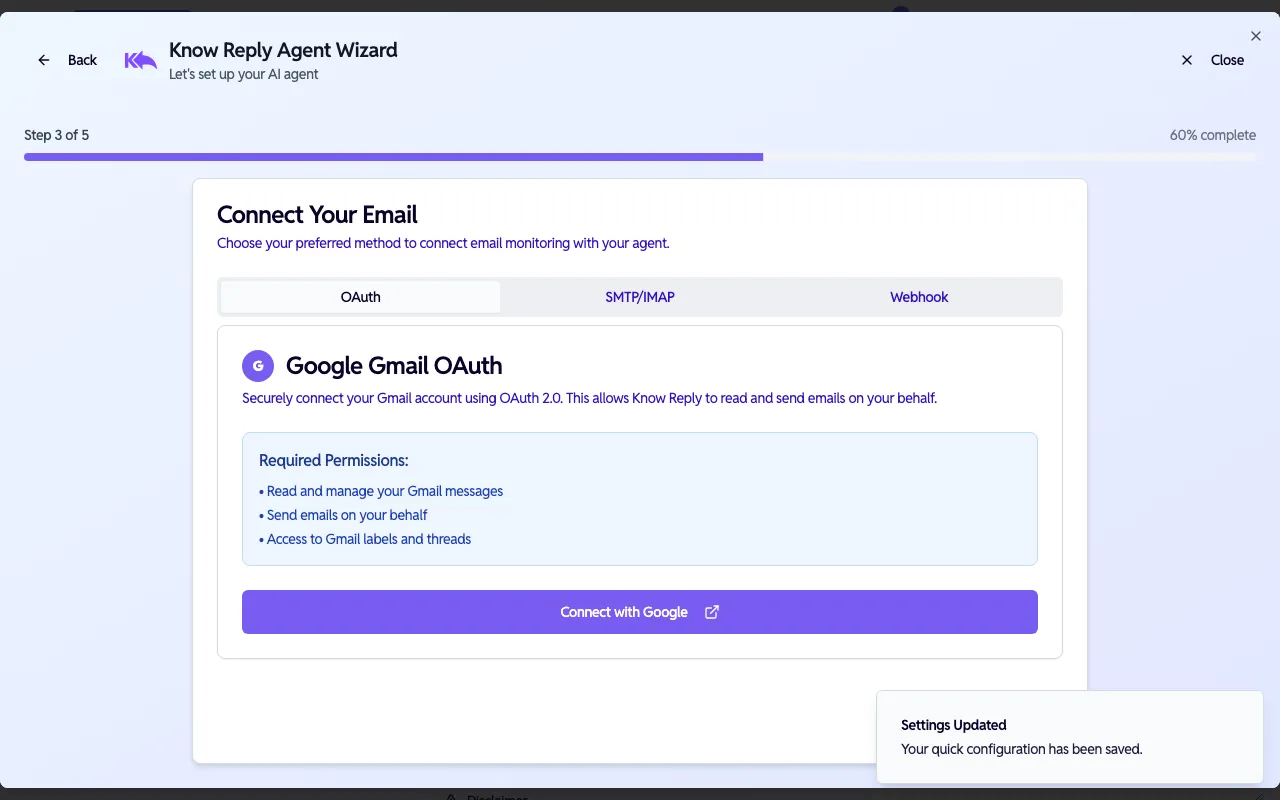
- OAuth — One-click connection for Gmail or Outlook
- SMTP/IMAP — Manual credentials for any email provider
- Webhook — For ESPs like SendGrid, Postmark, or Mailgun
You can skip this step and connect later from Dashboard > Activation.
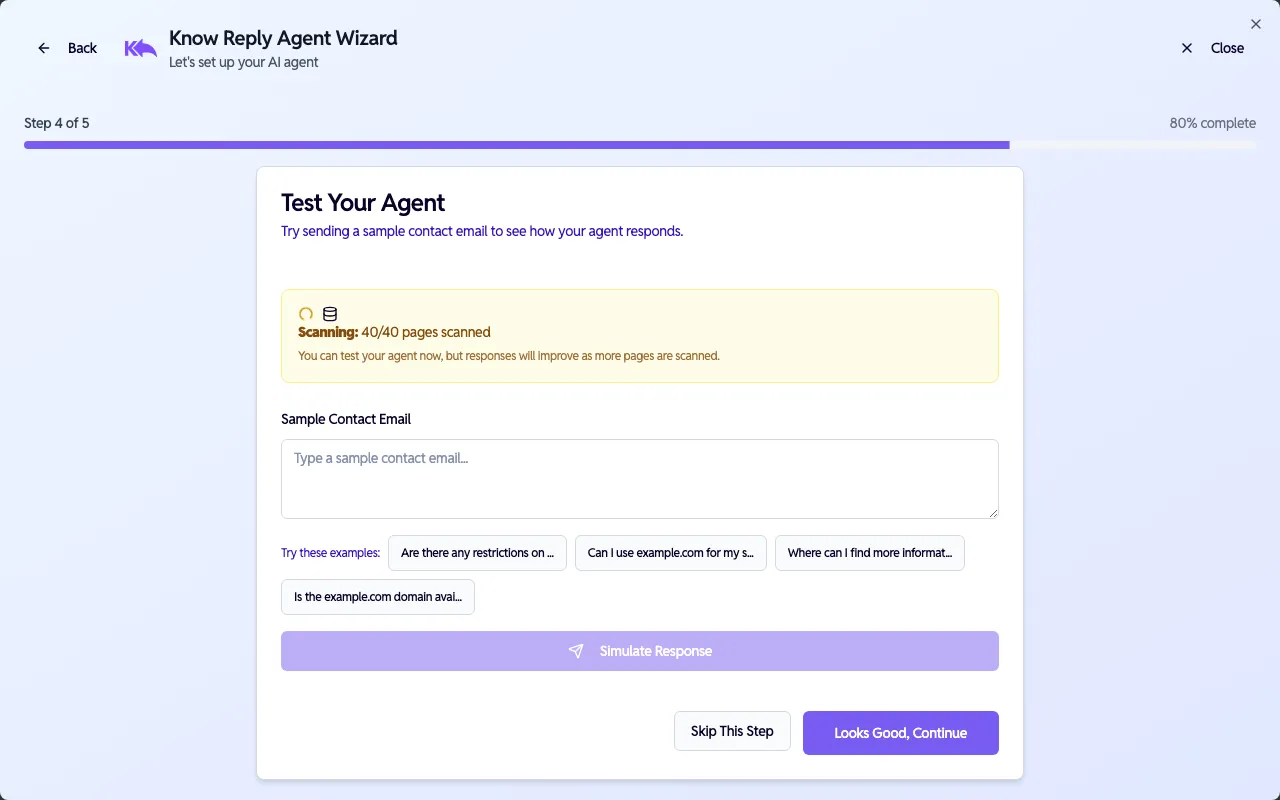
Test your agent
Section titled “Test your agent”Try your agent before going live. Enter a sample email or click one of the suggested questions to see how it responds.
You’re ready!
Section titled “You’re ready!”The wizard confirms your agent is set up and reminds you to activate it.
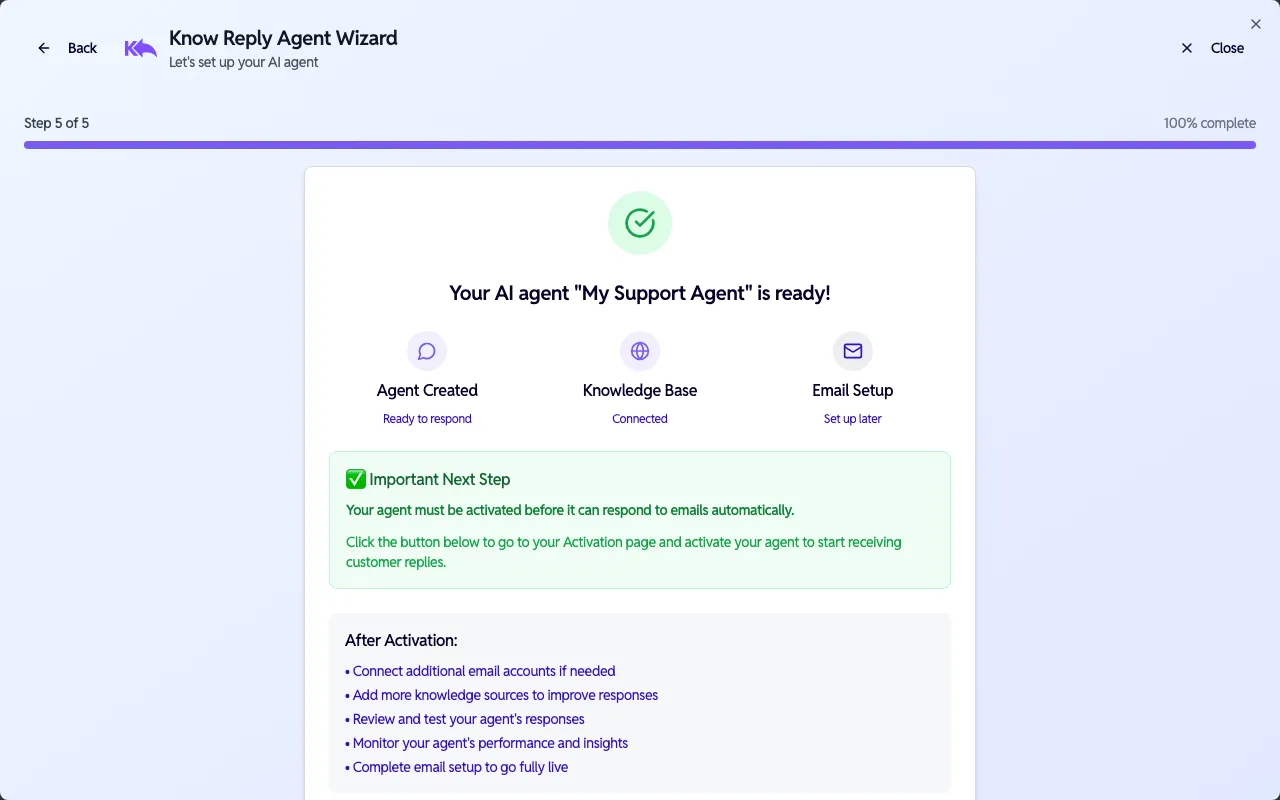
Your agent must be activated before it starts responding to emails automatically. Go to Dashboard > Activation to turn it on.
Next steps:
- Fine-tune your agent’s behavior — edit instructions, escalation logic, and signature
- Connect additional email providers
- Expand your knowledge base
- Add integrations