クイックスタート
Know Reply は 5 ステップで導入できます。5 分以内で完了可能です。
準備するもの
Section titled “準備するもの”- ビジネス用メールアドレス(Gmail、Outlook、または任意の IMAP プロバイダー)
- Web サイト URL(ナレッジベース構築用)
ステップ1: アカウントを作成
Section titled “ステップ1: アカウントを作成”app.knowreply.ai でメールアドレスとパスワードを使って登録します。
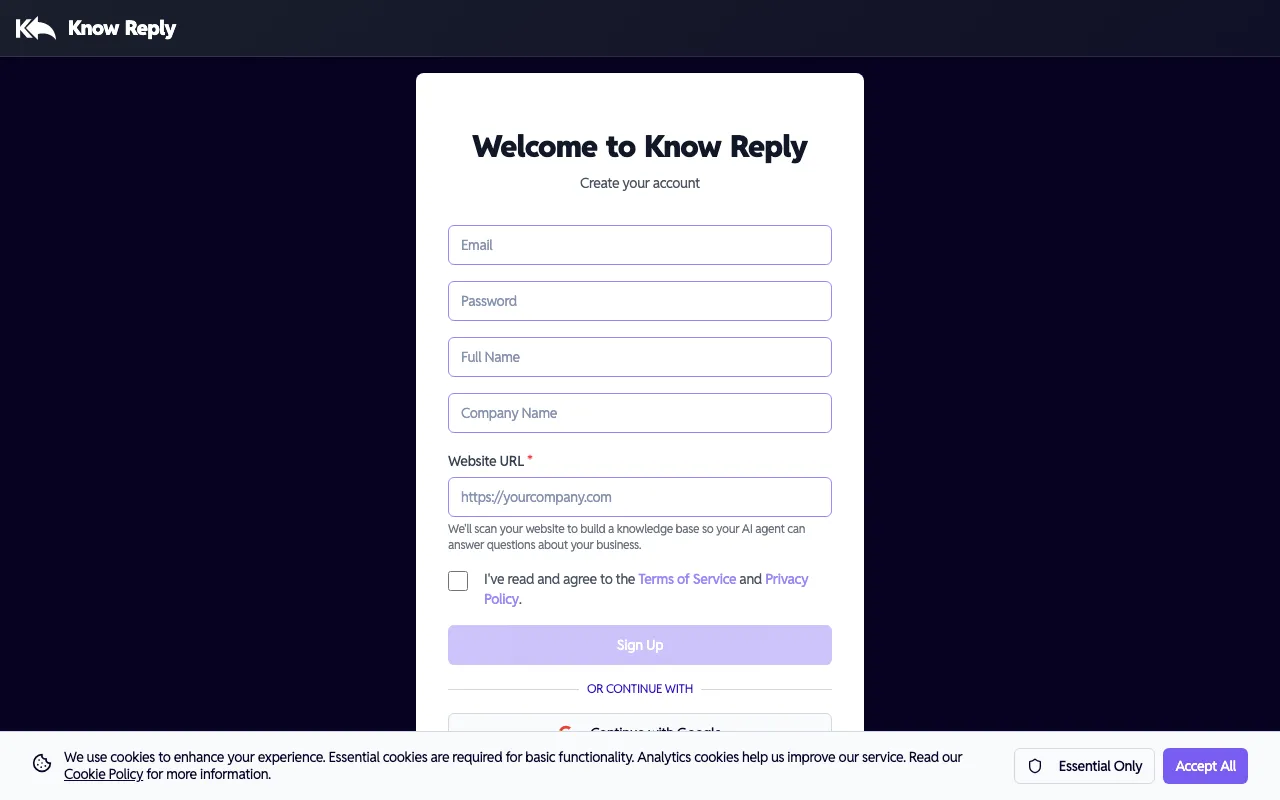
登録時に Company Name と Website URL を入力してください。Know Reply はこの情報を使って最初の AI エージェント を自動作成し、Web サイトのナレッジベース用コンテンツのスキャンを開始します。ログイン前でも エージェント をすぐ使える状態にします。
Google または OAuth で登録しますか? OAuth では会社 URL を取得できないため、エージェント は自動作成されません。問題ありません。ログイン後に Setup Wizard で数秒で作成できます。
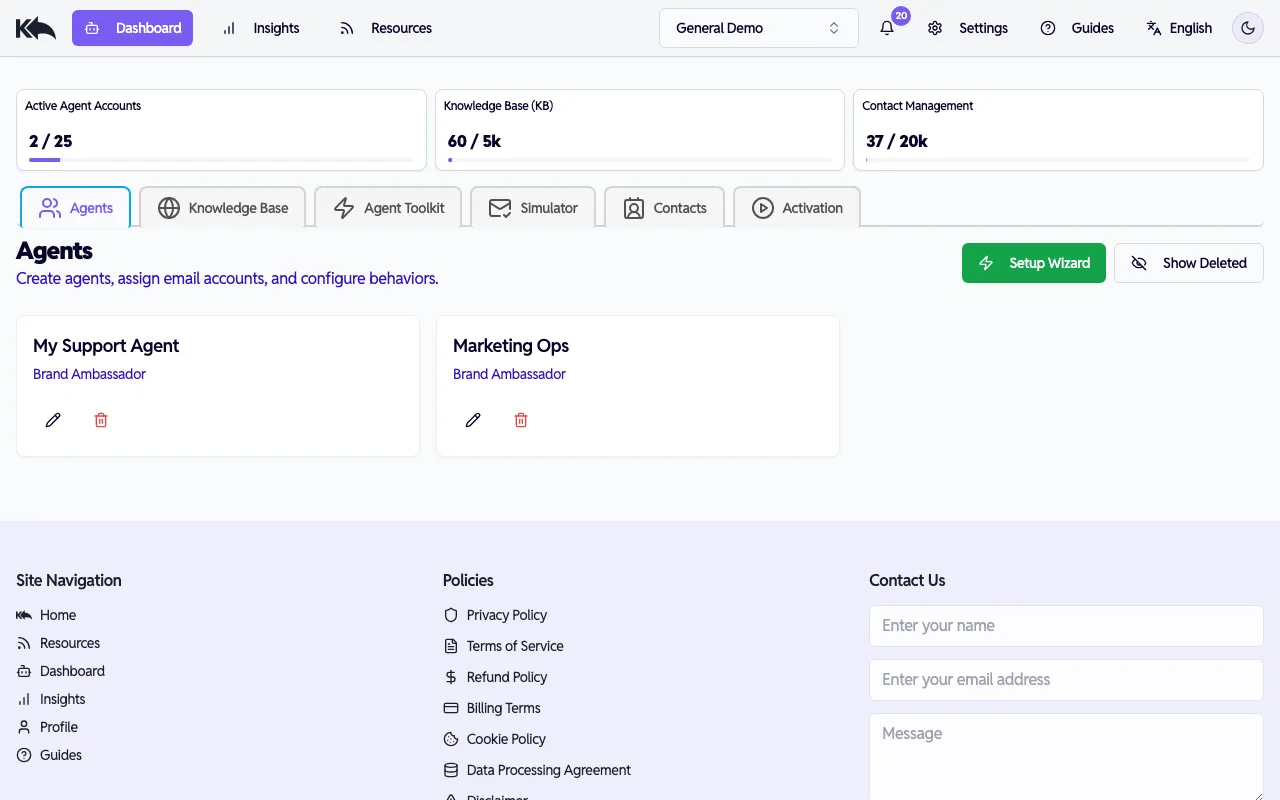
ステップ2: Setup Wizard を開始
Section titled “ステップ2: Setup Wizard を開始”ログイン後、Dashboard が表示されます。Setup Wizard をクリックして新しい エージェント を作成(または追加設定)します。
エージェント に名前を付けて Web サイトを接続
Section titled “エージェント に名前を付けて Web サイトを接続”エージェント 名を設定し、ナレッジベースとして使用する Web サイトを選択します。ここで新しい Web サイト URL を追加することもできます。
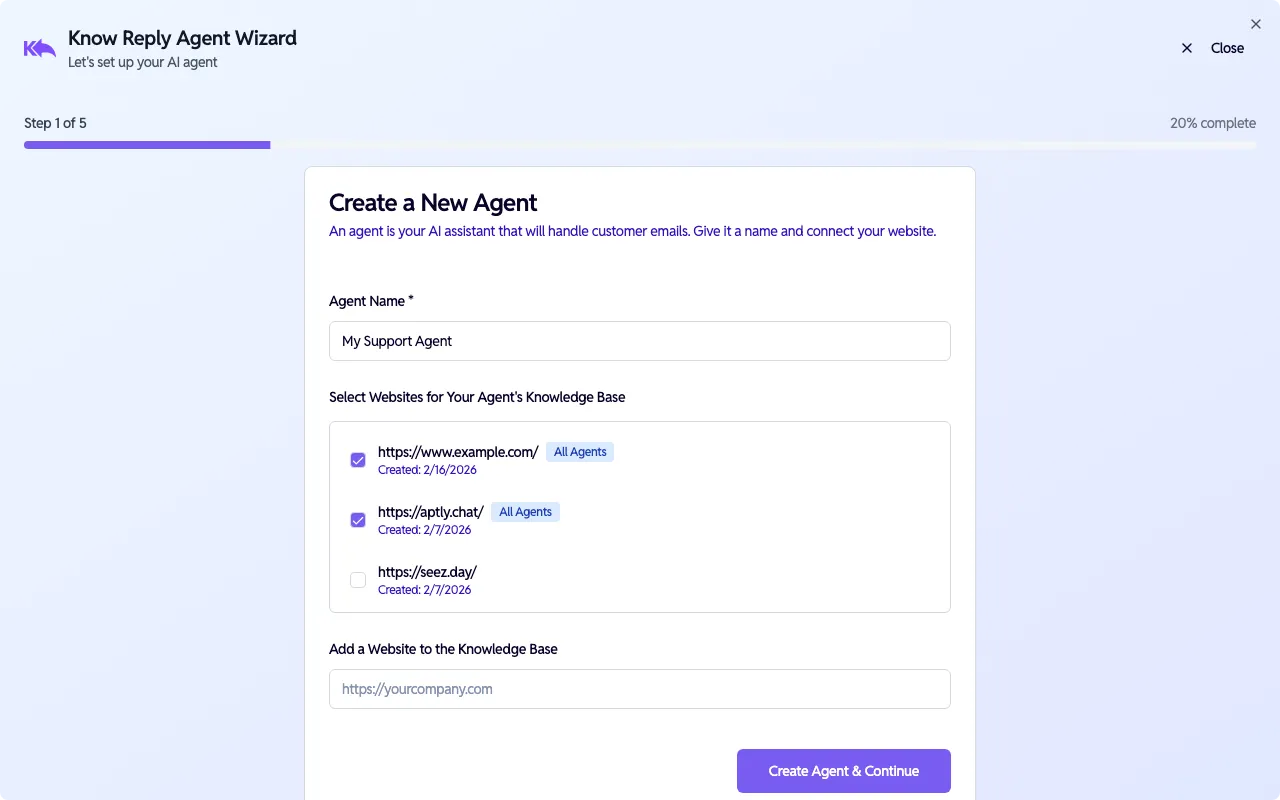
Create Agent & Continue をクリックして進みます。Web サイトのスキャンはバックグラウンドで開始されます。
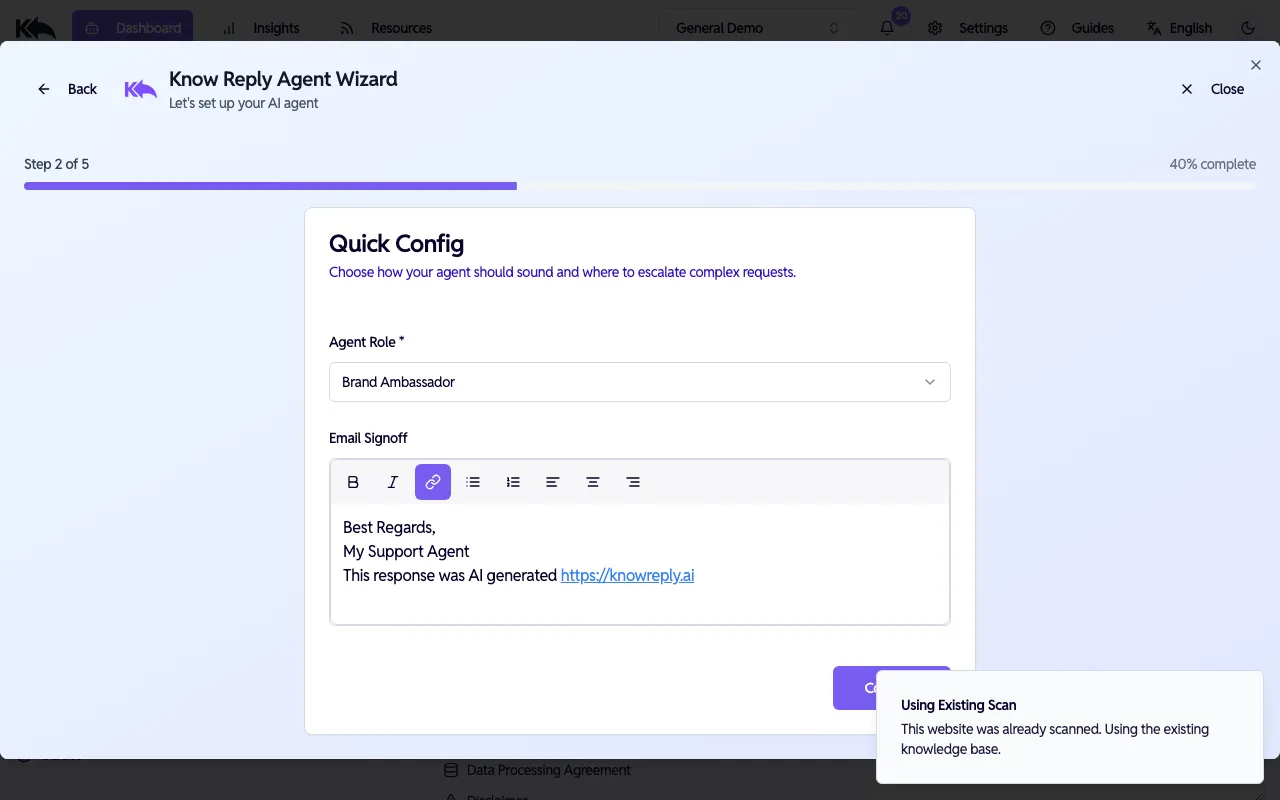
ロールと署名を設定
Section titled “ロールと署名を設定”Agent Role(Brand Ambassador、Customer Support、Sales など)を選び、各返信の末尾に表示される Email Signoff をカスタマイズします。
メールを接続
Section titled “メールを接続”エージェント が監視する受信トレイを接続します。以下の 3 つから選択できます。
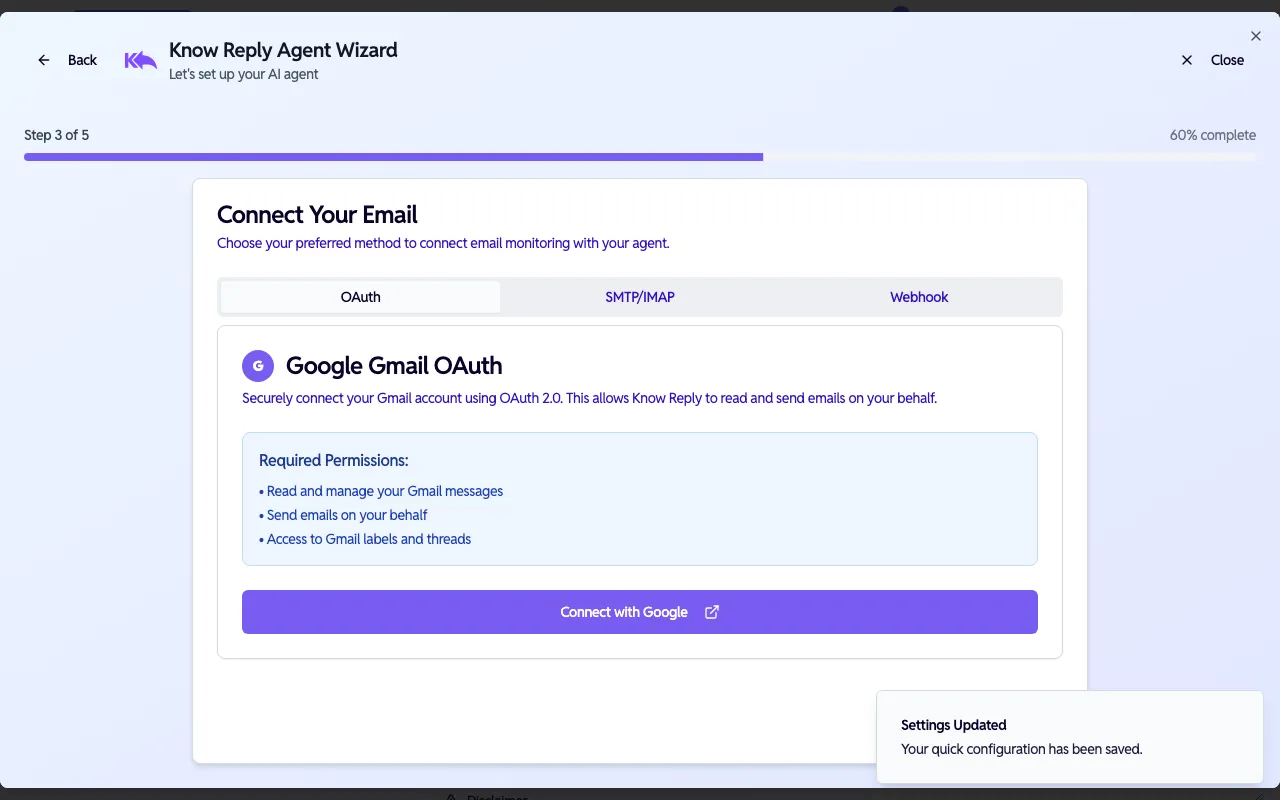
- OAuth — Gmail または Outlook をワンクリック接続
- SMTP/IMAP — 任意のメールプロバイダー向け手動認証情報
- Webhook — SendGrid、Postmark、Mailgun などの ESP 向け
このステップはスキップでき、後で Dashboard > Activation から接続できます。
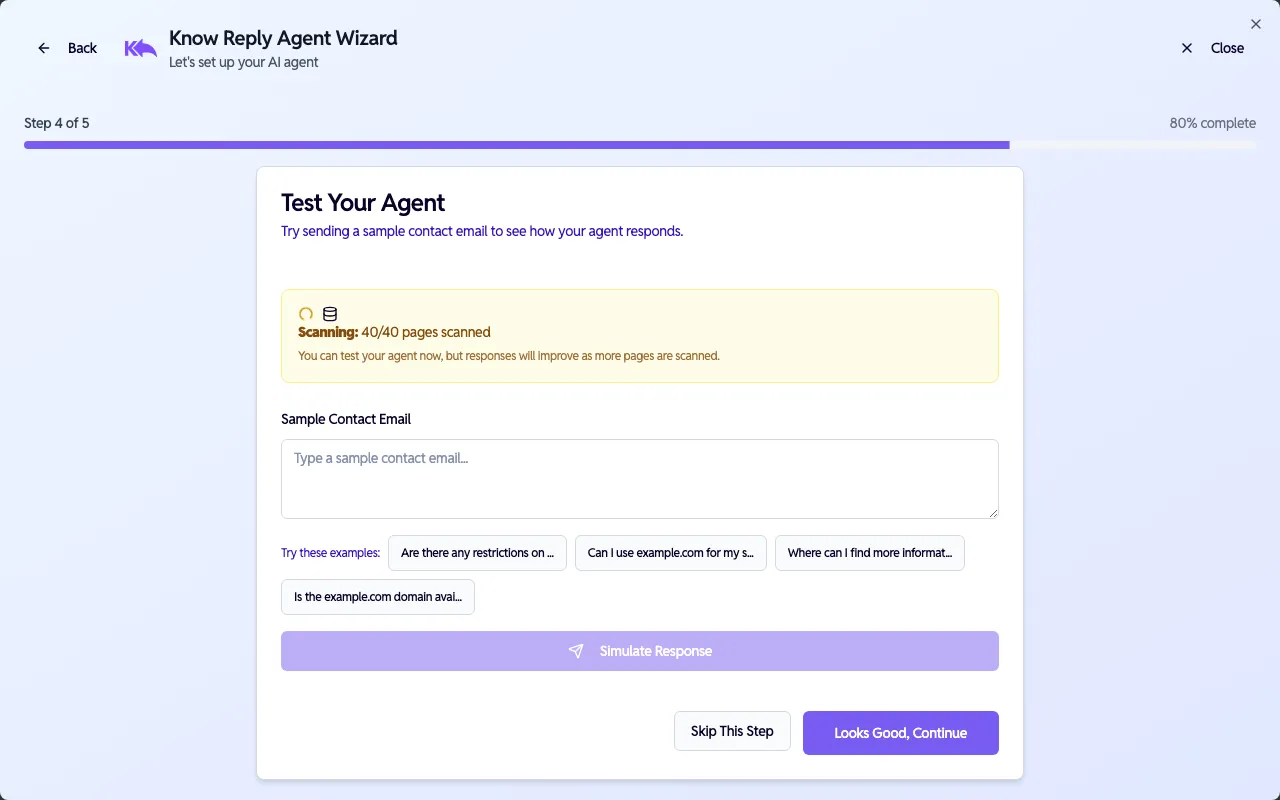
エージェント をテスト
Section titled “エージェント をテスト”本番公開前に エージェント を試します。サンプルメールを入力するか、提案質問をクリックして応答を確認します。
ウィザードが エージェント の設定完了を確認し、有効化を案内します。
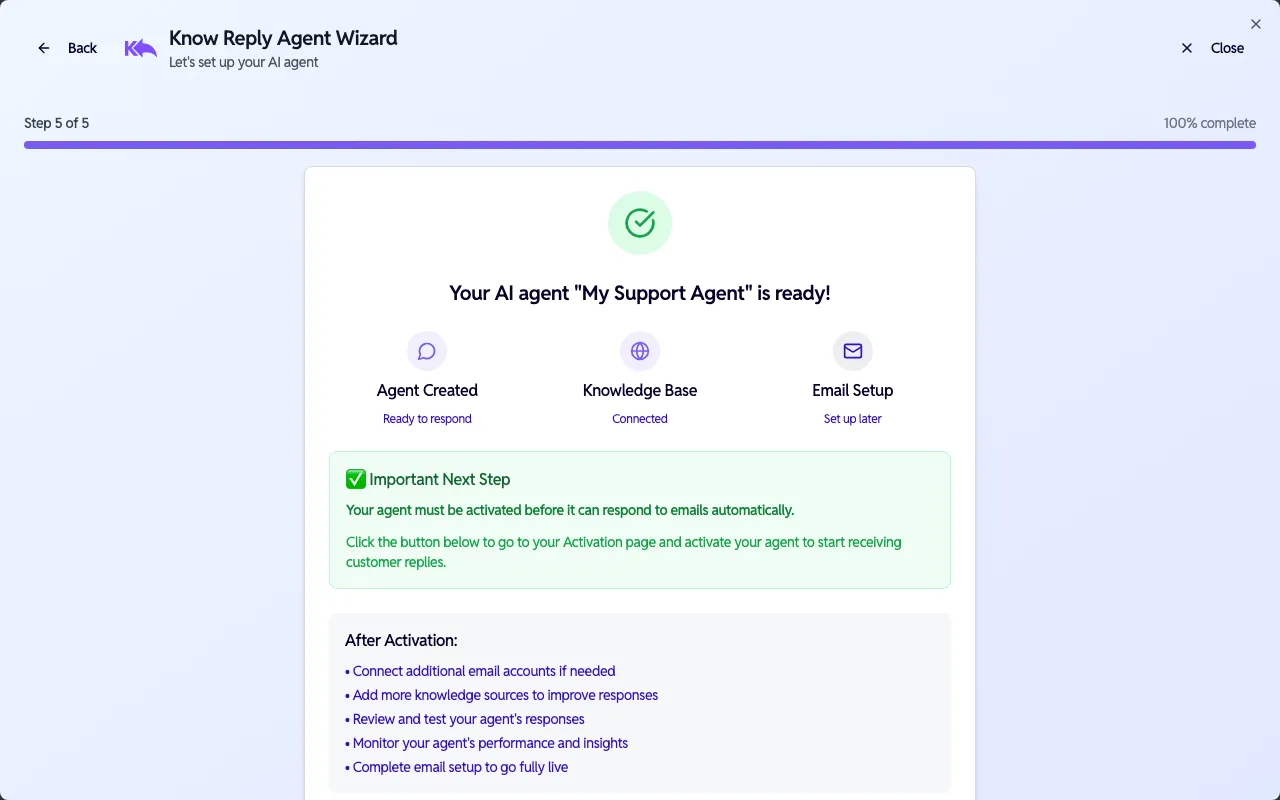
自動返信を開始するには エージェント を activated にする必要があります。Dashboard > Activation から有効化してください。
次のステップ:
- agent の動作を微調整 — 指示、エスカレーションロジック、署名を編集
- 追加のメールプロバイダーを接続
- ナレッジベースを拡張
- 連携を追加